
User Manual
Getting Started
Welcome to AnalystAssist, the bespoke platform for Live & Dry Blood Analysts!
Many thanks for choosing to register an account with AnalystAssist. This section of the User Manual is here to help you to quickly get started using the platform, and to learn how to integrate it into your analysis workflow. Please take a few minutes to read this page and watch the video below.
In this section we will cover:
Registering a new account & logging in for the first time.
The recommended computer specifications.
Connecting your microscope camera to the platform.
Additional setup options when you first start using AnalystAssist
The basic workflow pattern that AnalystAssist is designed around.
The help & support that is available and how to access it.
Becoming a Pro subscriber
Step 1 - Registering a new account
Getting access to the platform for the first time involves a few easy steps:
Complete the Registration form, with your email address and password.
Confirm your email address by clicking the link in the Confirmation Email that you are sent.
Complete the Log In form, using your registered email and password.
Choose whether to configure Two-Factor Authentication.
Gain access to the platform’s Dashboard.
Each of these steps are explained in more detail below:
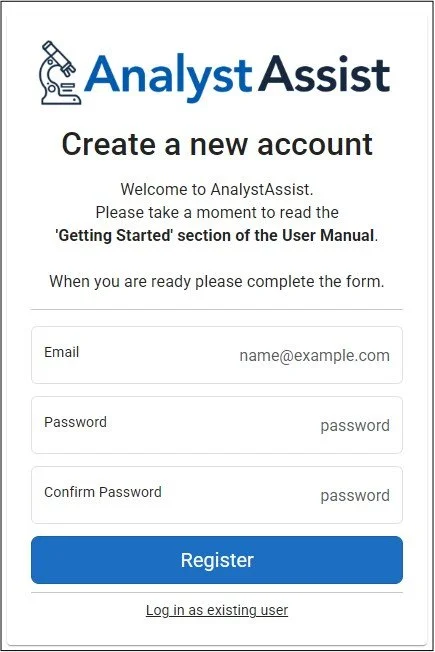
Completing the Registration form
To create a new User account, enter your details in the form:
Email address (this will be used for logging in only - not used for communication with Client/Patients).
Password - choose a secure password that has at least 6 characters, with at least one digit, one uppercase, one lowercase, and one non‑alphanumeric (special) character.
Confirm password - make sure to repeat the exact same password.
Click the ‘Register’ button to continue.
Confirming your email address
After registering your details, you will shortly receive a Confirmation Email to the email address that you have registered.
Click the confirmation link in the email to authenticate your account.
Please Note: If you don’t receive a confirmation email within a few minutes, please check your Spam/Junk folder. If you still cannot find the email, try completing the Log In process below - you will be given the option to re-send the confirmation email.
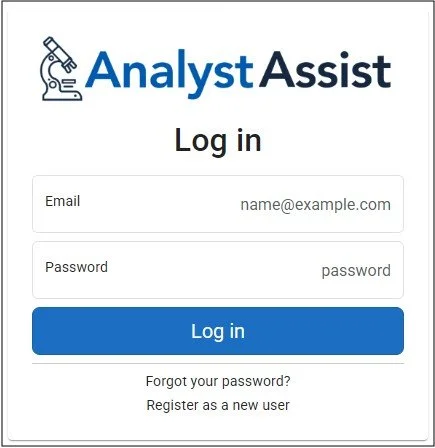
Logging in to your new account
When you have confirmed your email in the Confirmation Email, the Log In form will be displayed.
Complete the form with your registered email address and password, and click the ‘Log In’ button to continue.
Please Note: Should you ever forget your login password, you can reset it by clicking the ‘Forgot your password?’ link at the bottom of the Log In form. This will take you to a new screen where you can trigger a password reset email, enabling you to configure a new login password.
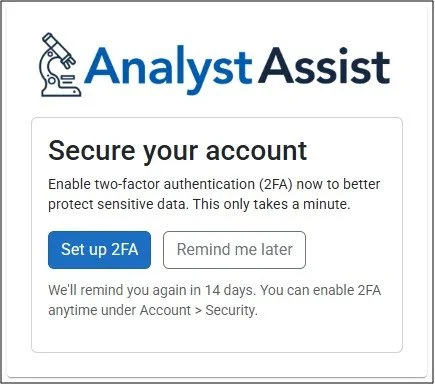
Configuring Two-factor Authentication
The next screen will ask you if you want to enable two-factor authentication. This is a way of further securing access to your account, by requiring the use of a mobile Authenticator app like those from Microsoft or Google. Click the ‘Set up 2FA’ button if you want to proceed with setting that up.
See the Account Screen page of the User Manual for details of how to configure two-factor authentication.
Alternatively, click the ‘Remind me later’ button to gain access to the platform immediately. The platform will periodically ask you if you want to set up two-factor authentication, and you can choose to do it at any time by following he instructions in the link above.
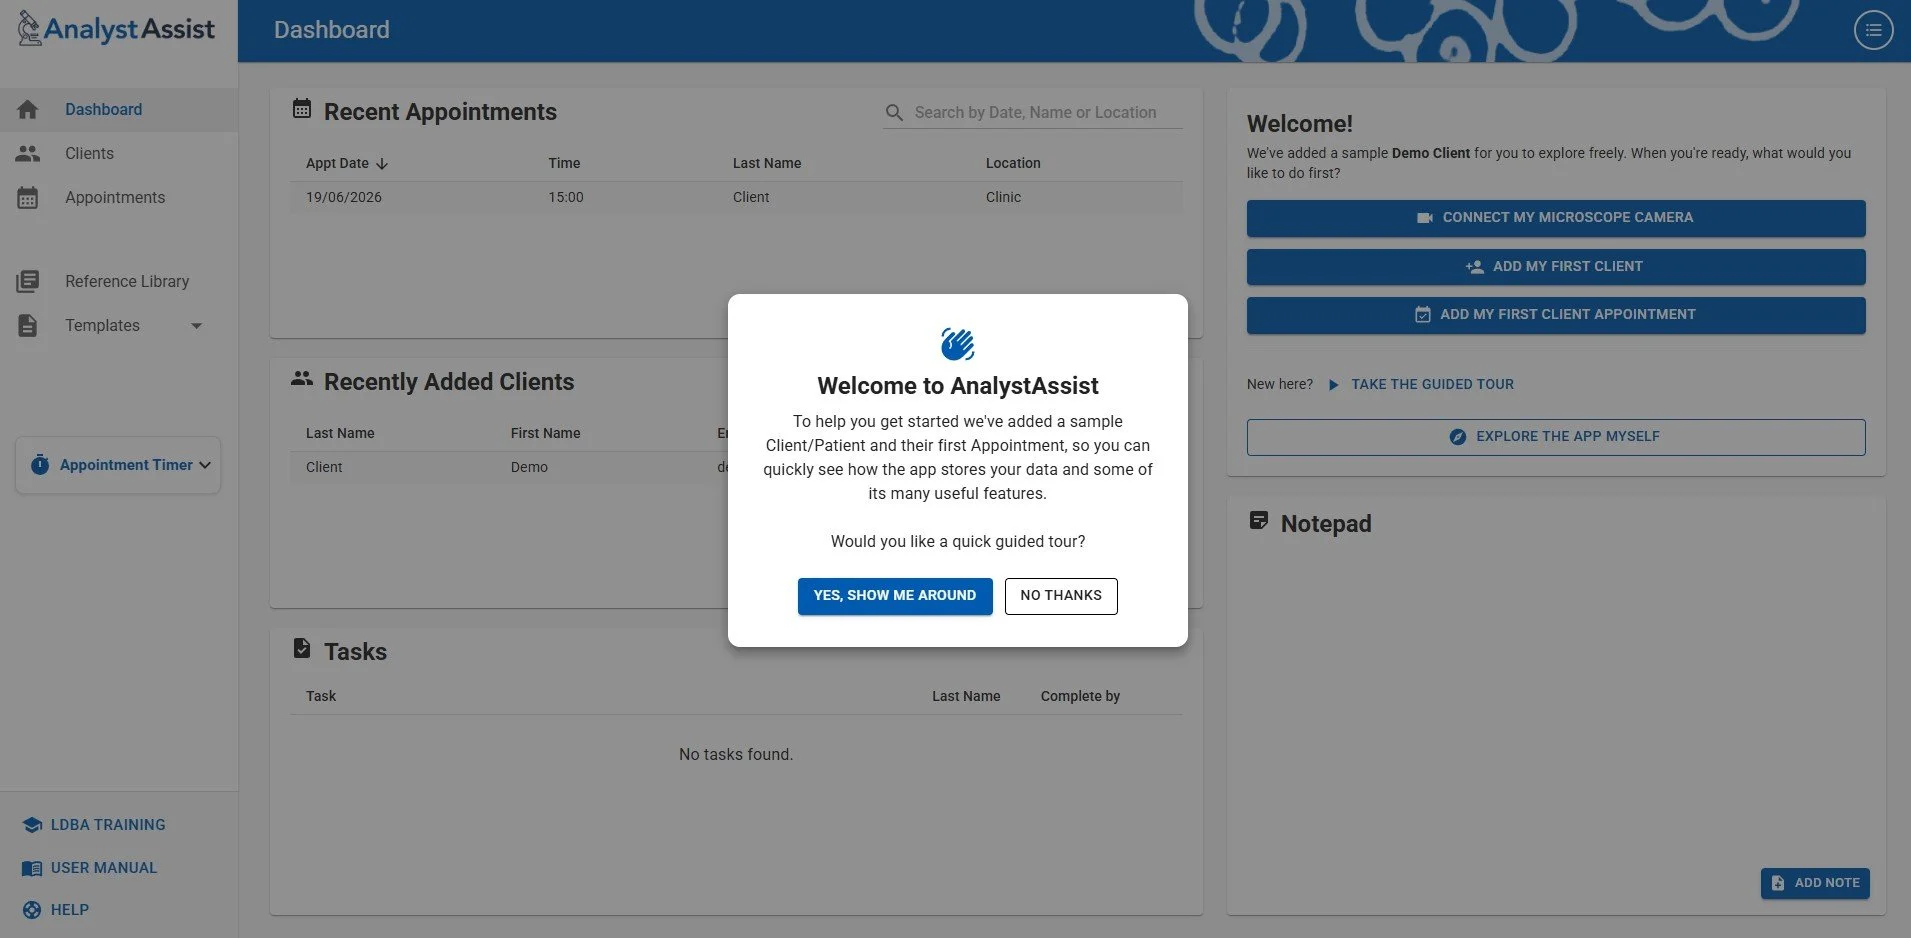
You are in!
You should now see the AnalystAssist Dashboard screen, with a welcome pop-up offering you a tour of some sample date to help you quickly become familiar with the app (see below).
Technical specifications
Internet connection - AnalystAssist requires a good internet connection to be able to interact efficiently with the server and navigate between pages. Slow connectivity can produce poor performance or may even impact data storage.
Computer - AnalystAssist is only compatible with desktop computers/laptops (Windows PC or Mac iOS), and won’t work on mobile or tablet devices. Although there is no minimum computer specification, peak performance will be achieved using a modern device that uses the latest operating system and has sufficient performance to run applications smoothly.
Browser - Although AnalystAssist will work on all major browsers, using a Chrome desktop/laptop browser is recommended. Make sure that your chosen browser is kept fully updated.
Screen resolution - AnalystAssist is optimised for use with a full-HD (1920x1080px) screen.
Please Note: Functionality / layout issues may be experienced using different screen resolutions or browsers.
Increasing your screen’s resolution
If you find the layout of AnalystAssist’s pages to be compressed, this may be due to your screen resolution being lower than full HD (1920x1080p). It may be possible to increase the screen’s resolution using the following steps:
Windows - On your bare desktop, click your right mouse button and select ‘Display Settings’. Make sure that you are addressing the correct screen (multi-screen setups) and scroll down to ‘Scale & Layout’ (Windows 11). In ‘Display Resolution’ check if the recommended setting is 1920x1080 or higher. If not, see if it is possible to increase the resolution using the drop-down selector. Alternatively, the Scale may be set at more than 100%. Adjusting this lower may also improve AnalystAssist’s layout.
Mac iOS - From the Apple menu at the bottom of the page, select ‘System Settings’, and then ‘Displays’. Make sure that you are addressing the correct screen (multi-screen setups) and if there is the option to choose ‘More Space’ then select that.
Step 2 - Taking the guided tour
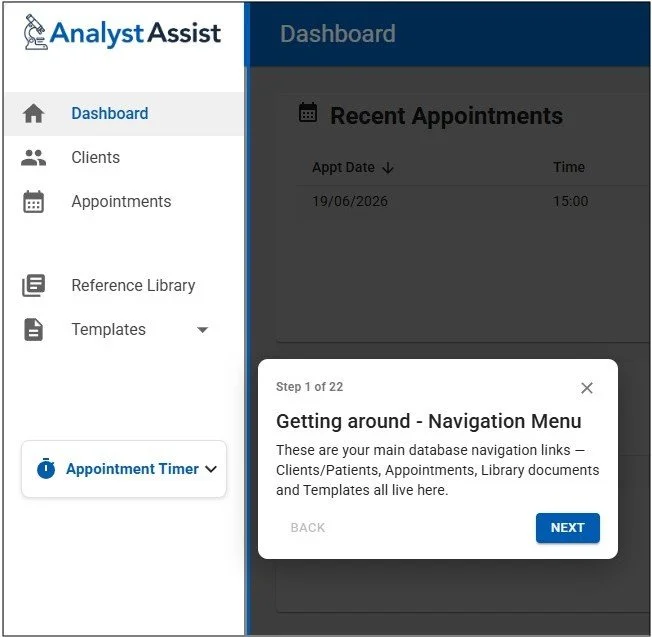
To get you up to speed with how the app stores your data and to ilustrate some of the features of AnalystAssist, when you first create an account the app has been seeded with a ‘Demo Client’ record and a related ‘Appointment’.
When you first log into the app a welcome pop-up offers you the chance to take a short ‘guided tour’.
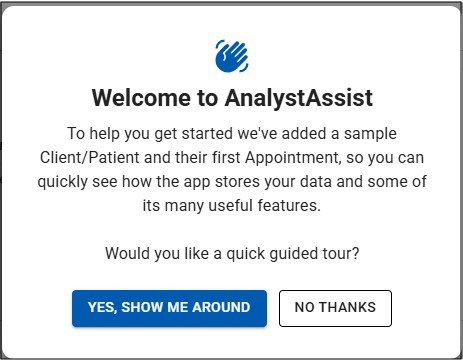
This short tour highlights lots of key areas in different pages throughout the app, and shows you where to trigger many useful workflow functions. You can cycle through the tour using the ‘Next’ or ‘Back’ buttons, or click the small cross icon in each pop-up to cancel the tour and return to the Dashboard.
Please Note: As soon as the Demo Client record is deleted or a new Client/Patient record is added, the tour will no longer be offered.
Step 3 - Connecting your microscope camera
Your first task when you access the AnalystAssist dashboard, is to make sure that the platform can properly connect to your microscope camera.
To do this, click the ‘Connect my microscope camera’ button on the Dashboard (top right of main panel), and then follow the instructions in the ‘Live View Panel’ User Manual page to fully connect and configure your camera, ready for analysing blood.

The AnalystAssist Workflow
You can of course use AnalystAssist in any way that you like, however the platform has been designed with a fairly typical Live & Dry Blood Analysis workflow in mind.
To quickly help you understand what features are available, below is the design workflow including links to the relevant sections in the User Manual. Beneath that is a short video demonstrating these steps.
Please Note: Some features are only available with a Pro subscription.
A new Client/Patient contacts you to book an Appointment, giving their name and email address.
From the Dashboard, you add a ‘Client record’ to AnalystAssist using their name and email address. Click the ‘+ CLIENT’ button on the dashboard to get started.
You send the Client/Patient an induction email from AnalystAssist (using the ‘Pre-appointment’ email template or any custom template) that includes links to your digital induction/consent forms. You can generate forms from any of the pre-designed form templates or use your own custom designs.
The Client/Patient completes those forms online and submits them - their details are automatically updated in the Client/Patient Record and the completed forms are added as PDFs to the Client/Patient record. Any documents that the Client/Patient sends you by replying to your email (e.g. medical reports, blood test results) you can upload to the Document Folder in the Client/Patient record.
You add an ‘Appointment record’ to AnalystAssist from the Client/Patient record, including the appointment date, and optionally the time and location.
On the day of the appointment, you perform the analysis, capturing Live & Dry Blood Images in the Appointment record. You also add any required Appointment Notes as a private reminder to yourself.
After the appointment, in the Appointment record you review the blood images giving them identifiable titles and adding Image Notes, and optionally complete the Blood Record sheets (rating the strength of presence of any Indications in the blood).
When you are ready to create your Appointment report for the Client/Patient, you review all the information in the Appointment record, and fill out the ‘Interpretation’ and ‘Recommendation’ sections (optionally using AI-powered voice dictation). You then create a branded PDF report using one of the report templates (or your own custom template), depending on your format requirements. The report is automatically added to the Client/Patient record’s Document Folder.
From the Client/Patient record you send an email (using the ‘Post appointment’ email template or any custom template) and automatically attach the Appointment Report PDF and any Library Documents (such as treatment protocols, or research articles).
Recommendation: Before using AnalystAssist with an actual Client/Patient, create a demo Client/Patient record using your own email address, and a dummy appointment and go through the full workflow above to understand your Client/Patient’s experience, and how the various features of the platform work.
AnalystAssist - Full Introduction & Workflow Demonstration
Help & Support
You have various options available to you to gain assistance - to learn how to use the platform, to suggest new features or to get help when you have a problem.
Learning how to use AnalystAssist
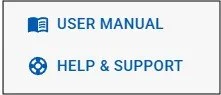
User Manual - As you can see, the User Manual includes a detailed description of all screens and features of AnalystAssist. Wherever you are in the platform, if you click the ‘User Manual’ link in the bottom left of the screen, a new browser tab will open displaying the relevant section of the User Manual. Use the index on the left of the User Manual to navigate between different manual pages.
Resolving problems
Please Note: AnalystAssist is optimised for use with a full-HD (1920x1080px) screen & Chrome desktop browser,but will work on all major browsers. Functionality / layout issues may be experienced using different screen resolutions or browsers. AnalystAssist will not work on older laptops with 1366x769px screens, nor on mobile or tablet devices.
Troubleshooting - For some recommended steps to resolve common problems, click here.
Getting help
Before reporting a problem, please try reloading the screen (click the circular arrow icon in your browser’s header) or refresh your browser page cache (Windows: Ctrl + F5 / Mac: Cmd + Shift + R), and if that doesn't work, please try viewing the platform in a different browser.
There are also various options for gaining assistance - find all of them by clicking the ‘Help & Support’ link at the bottom left of the AnalystAssist platform.
Email Support - If you can’t find answers in the User Manual or the Community Forum, you can email us at support@analystassist.com or contact us directly using the technical support form. Please try to include as much information as possible about what the problem is, when it occurred and what you were doing in the platform. We will back to you as soon as possible.
Pro subscribers
The ‘Free Trial’ version of the platform has a number of limitations related to the total number of Clients, Appointments and Blood Images which you can read about here. To remove these limitations, take out a Pro subscription to the platform.
Please Note: there are various payment options for the Pro version, including a ‘Pay Monthly’ option, and a discounted ‘Pay Yearly’ option where you receive 2 months free access. See the current pricing here.
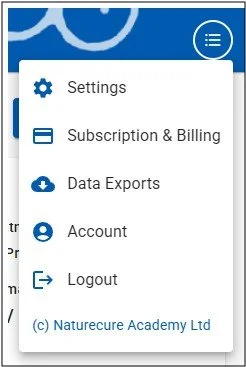
Click the Admin Menu button in the top-right corner of the platform, and then select ‘Subscription & Billing’ to view the options and start a subscription.
Step 4 - Additional Setup Options
The following additional options for configuring AnalystAssist are available:
Add a logo image - customise Forms and Reports to use your own logo.
Add your Practitioner/Practice name - All emails sent from the platform will have your Practitioner/Practice name as a prefix in the subject line so your Clients always recognise who it is from.
Add a Reply-to email address - enable Client/Patients to reply to the emails that you send from AnalystAssist, and receive their responses in your email account.
Add an email signature - instead of having to add your name/email signature manually every time you send an email from AnalystAssist, hard-code them into the app Settings so they are added automatically.
Create your own completely bespoke templates - change the default templates, or add your own Email, Form or Report templates.
Add your primary clinic location and/or directions - automatically embed this information into email templates and bespoke emails.
Change the auto-timeout delay - by default, AnalystAssist will log out for security reasons after being idle for 10 minutes. Change this period from 1 minute to 30 minutes.
Change AnalystAssist’s naming convention - if you would rather use the term ‘Patient’ than ‘Client’ you can change this throughout the platform.