User Manual
Client/Patient Record
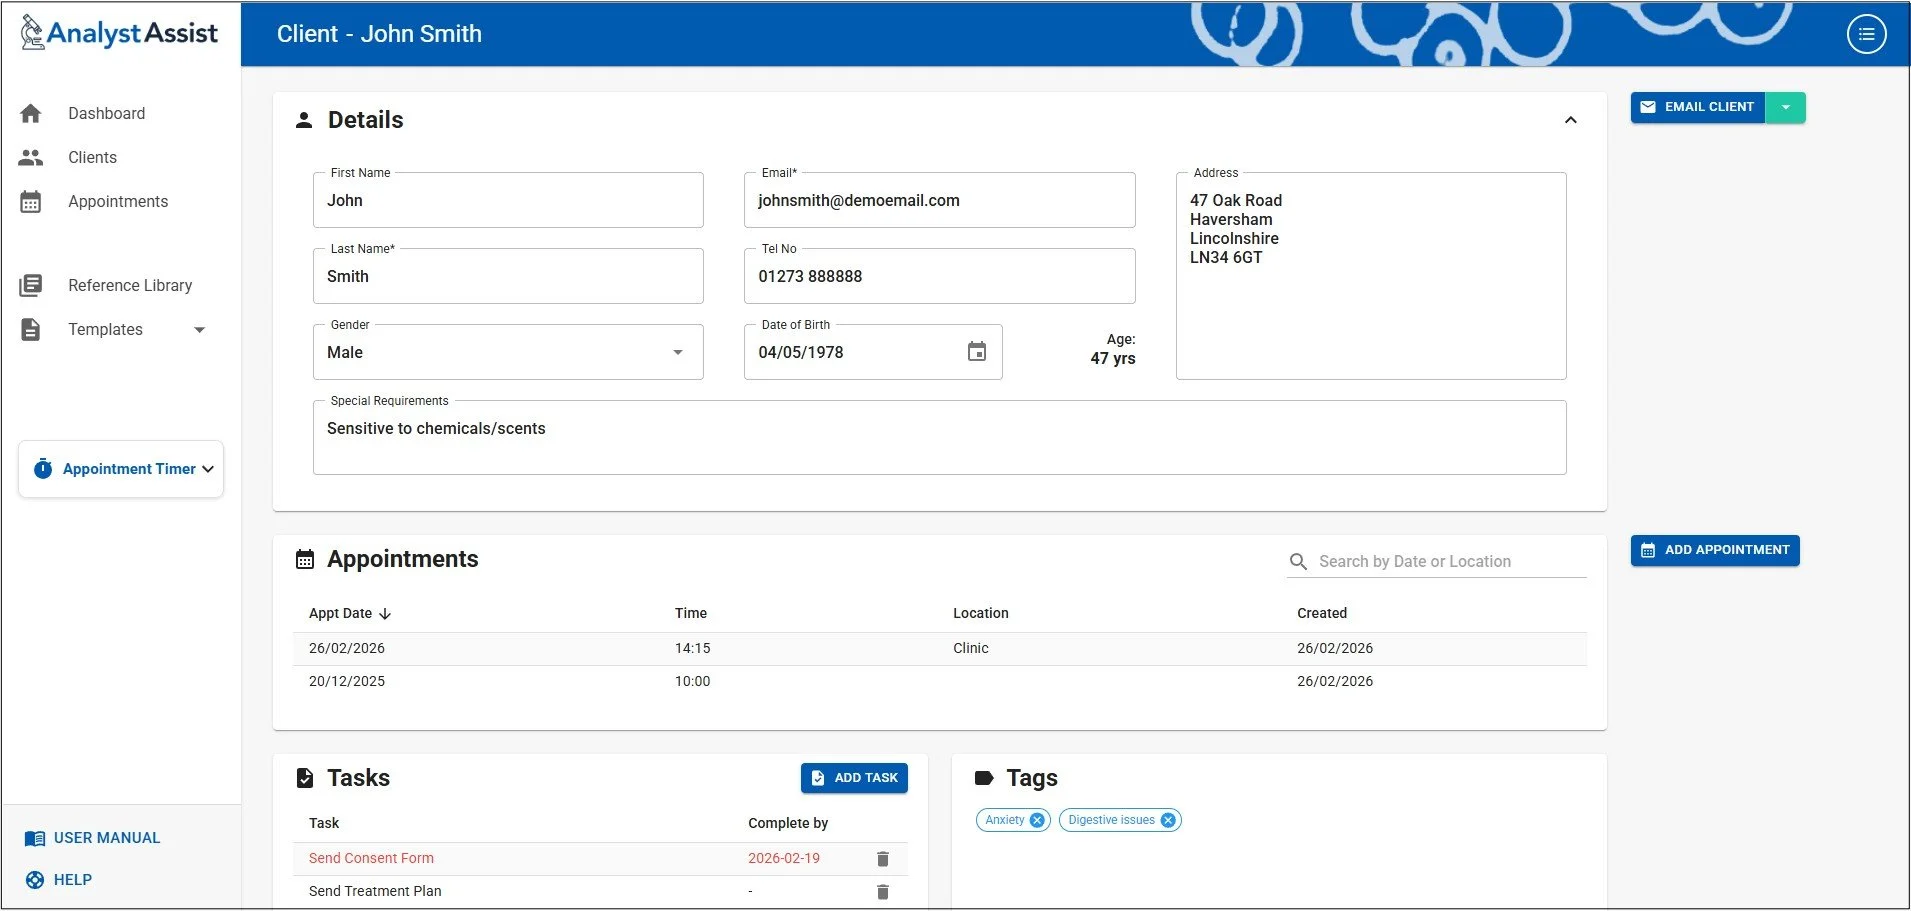
Client/Patient records are where you store all information about an individual Client/Patient, and where all their Appointments are listed. You can also store documents related to the Client/Patient such as test results, or medical reports, and add Notes, Scheduled Tasks, and identifying Tags. Also, when you generate Appointment Reports, this is where they are stored.
New Client/Patient Records can be created by clicking the ‘ + CLIENT’ buttons in the Dashboard or ‘Clients’ screen.
Please Note: Free Trial accounts are limited to 10 Client/Patient records. Subscribe to the Pro version in order to be able to create unlimited Client/Patient records.
Details panel
When a new Client/Patient Record is created, an empty Details panel is displayed. Completing this panel and saving the data will generate a Client/Patient Record in the database and then trigger the rest of the Record page to display.
The Details panel includes:
First Name - (optional)
Last Name - (required)
Gender - (optional) Drop-down selection list that includes ‘Male’, ‘Female’, and ‘Unspecified’. If either ‘Male’ or ‘Female’ are selected, this Client Record will be included in the gender statistics in the Dashboard.
Email - (required) Must be completed using appropriate email syntax (including an @ symbol).
Tel No - (optional) Non-formatted field.
Date of Birth - (optional) A value is added by clicking this field, which will display a Date Picker component that allows you to select any date. Doing so will automatically display the Client/Patient’s age in years (or in months for children under 2 years old), updated every time the Client Record is opened.
Address - (optional) Multi-line field.
Special Requirements - (optional) A way to record any special access needs, or other important considerations/requirements related to this Client/Patient.
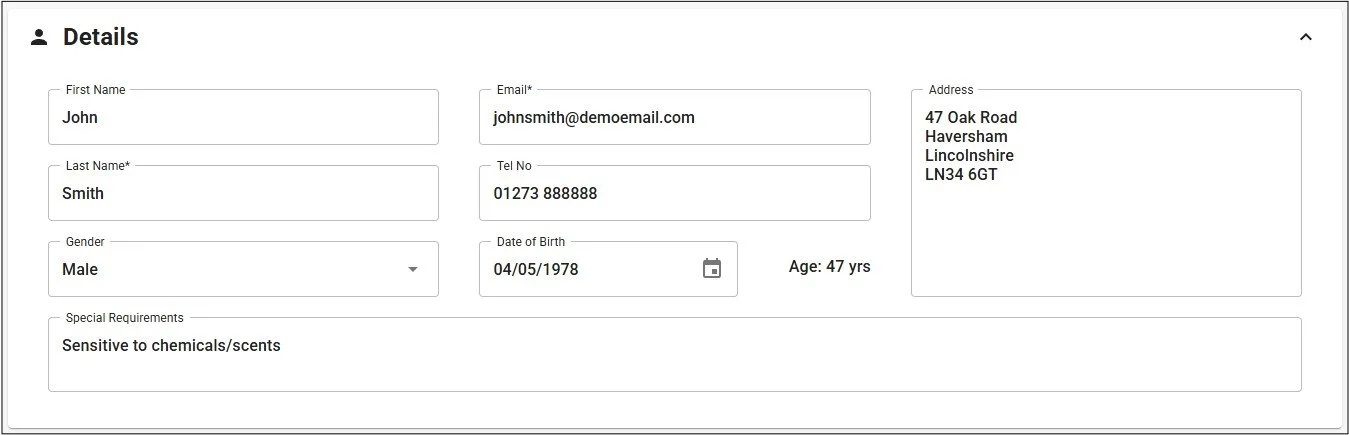
Adding data to, or changing any of the above fields, will display the ‘Save Changes’ and ‘Cancel’ buttons which allow you to update the database or reset all values to the original values contained in the database. Clicking the ‘Escape’ key on your keyboard will also reset any altered field.
After initial creation, when a Client/Patient record is opened, the Details panel is collapsed to save space. It can be opened at any time by clicking the collapsed panel.

Appointments panel
The Appointments Panel displays all Appointment Records in the database that relate to this Client. By default they are in descending Appointment Date order.
Viewing an Appointment Record - Open a specific Appointment Record by clicking any row in the table.
Change Display Order - Click any column header to switch sorting to that property in ascending or descending order (an arrow next to the sorted column designates which).
Search by Date or Location - Filter the list of Appointments to specific dates / date ranges / locations by typing characters into the Search field. Deleting them again will reset the table.
Add New Appointment - Click the ‘Add Appointment’ button to open a blank Appointment Record for this Client/Patient.

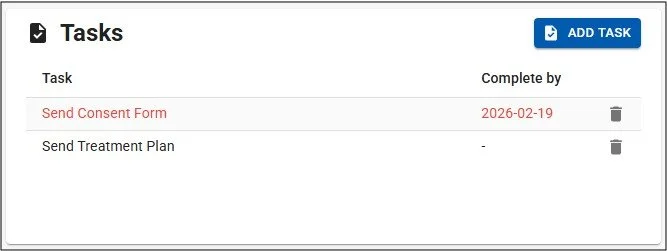
Tasks panel
The Tasks Panel allows you to create reminders for yourself of actions required for a Client/Patient. These might be reminders to send information, to book a repeat appointment or to contact the Client/Patient. Entries include a Task name (selected from the global Task Type list configured in the Settings page, or a custom value) and an optional ‘Complete by’ date.
When Tasks become due (they have a Complete By date prior to or including today), they are displayed in red. As well as being displayed in this panel, existing Tasks for all Clients/Patients are displayed in the Tasks panel on the Dashboard, for easy access and to remind you.
Task Order - Tasks are displayed by Complete By date (descending) if they contain that attribute, then in order of their creation (descending) if they don’t contain a Complete By date attribute.
Add a New Task - Click the ‘Add Task’ button to open the New Task edit panel. Click on the Task Name field to reveal the drop-down list of global Task Types. Either select an item from the list or type a custom Task Name into the field. Next, optionally click the ‘Complete By’ field to display the date picker component for selecting a date. To save new or updated task entries click the ‘Save’ button. To reset the edit panel, click the x button at the right-hand end.
Deleting a Task - Click the trashcan icon next to a Task to permanently delete it from the database.
Tags panel
Tags are used to identify Client Records by symptom, treatment regime, demographic or any other descriptor. This allows you to search by those Tags in the Clients page. That way you can identify all Clients/Patients with similarities, in order to compare analysis results or copy treatment protocols used.
You can either select an existing Tag Type (from the global Tag Type list that is configured in the Settings page), or you can add a bespoke Tag in this panel and it will be automatically added to the global Task Type list. Tags are displayed in the Tag panel in alphabetical order.
Add a tag - Click the ‘Add a tag’ field and the Tag Type drop-down menu of all global Tag Types will display. Select one from the list or type a new Tag Type into the ‘Add a tag’ field and click the Enter button to add it to the Client/Patient Record. Click the ‘Escape’ button (not Safari) or mouse click anywhere else on the screen to close the drop-down menu.
Delete a tag - Click the x button at the right-hand end of any green Tag marker to delete it from the Client/Patient Record.

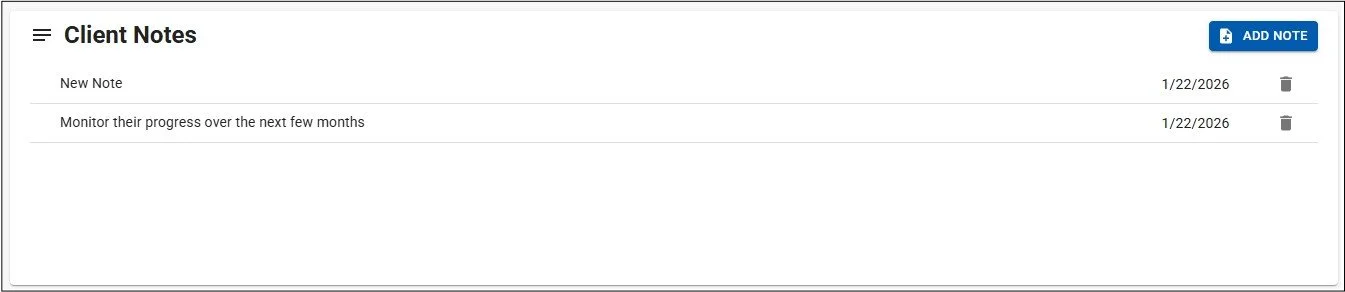
Client/Patient Notes panel
Client/Patient Notes are a way to record progress about a Client/Patient, detail the treatment approach, highlight important issues that you need to be kept aware of in future Appointments, and store any other relevant information relating to your Client/Patient.
The Notes are displayed in descending order of when they were created (most recent first).
Add/Edit a Note - Click the ‘Add Note’ button and a ‘New Note’ with today’s date will be added to the top of the table. Click on any Note to edit the wording and when you are finished, click the ‘Save Note’ button that appears to store changes permanently in the database. To undo any changes or stop editing a Note without saving, simply click the Escape key (not Safari) or mouse click anywhere else on the page.
Delete a Note - Click the trashcan icon next to a Note to permanently delete it.
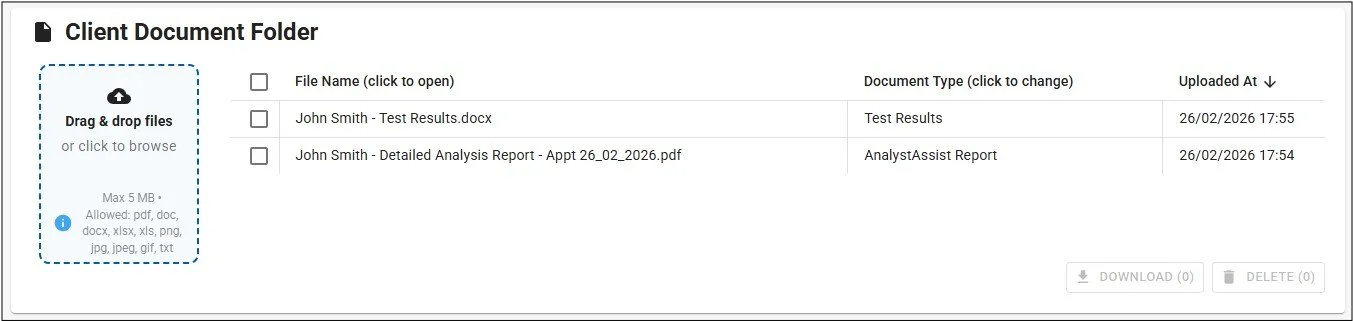
Client/Patient Document Folder
The Document Folder is where all Documents relating to this Client/Patient are stored. It is possible to attach any file(s) contained in the Document Folder to Client/Patient emails.
Items in the Document Folder can be:
Documents that you upload such as Test Results, or scans of hand-completed forms.
The outcome of any digital Forms that you have attached to emails (see Sending Digital Forms & Appointment Reportsmanual page) for Client/Patients to complete.
Any Appointment Reports generated in Appointment Records related to this Client/Patient (see Appointment Record manual page).
The Client/Patient Document Folder is used in exactly the same way as the main app Reference Library, so refer to the Reference Library manual page for instructions (e.g. clicking a File Name will open the document preview window).
Main button menu
To the right of the Details panel is the main button drop-down menu. The menu can be opened by clicking the green down arrow at the right-hand end:
Email Client - This will trigger the Email Composer panel to display so you can send emails directly to Clients/Patients (see ‘Emailing Digital Forms & Appointment Reports’ manual page)
Add task - Add a New Task to the Task panel (see below)
Add Note - Add a New Note to the Client/Patient Notes panel (see below)
Delete Client - Open the Delete Client confirmation dialog (see below)

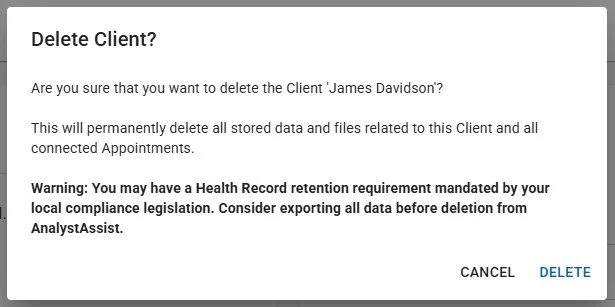
Deleting a Client/Patient Record
When you select the ‘Delete Client/Patient’ button in the main button drop-down menu, the ‘Delete Client/Patient?’ confirmation dialog is displayed.
Deleting the Client/Patient Record - Selecting ‘Delete’ in the ‘Delete Client/Patient?’ confirmation record will delete the Client/Patient Record permanently from the database (non-reversible) as well as all associated Appointment records & documents:
All Client/Patient Notes, Tasks and Tags related to this Client/Patient Record.
All Client/Patient Documents related to this Client/Patient Record.
All Appointment Records related to this Client/Patient Record.
All Appointment Blood Images related to this Client/Patient Record.
Cancel deletion - To exit the ‘Delete Client/Patient?’ confirmation dialog without deleting the Client/Patient Record, click the ‘Cancel’ button, or the ‘Escape’ key on your keyboard (not Safari).