
User Manual
‘Content’ component panels
Content component panels are found in the Form Template Designer and the Report Template Designer pages and are one of the drag & drop components available in the Template designer sidebar. These panels are for constructing sections of text/fixed content to be embedded in forms or reports.
Content components include several key features:
Rich text editing - Add text with various formatting elements including font size, font styles and bullet points.
Hyperlinks - Configure sections of text to be hyperlinks for linking to webpages.
Image insertion - Add images such as business logos to text sections.
Quotation sections - Add a formatted section with a vertical grey marker and italic text.
Tables - Add an outlined full-width table with any number of rows and columns.
Field tag insertion - Add field tags that are replaced by data from the relevant Client/Patient or Appointment record.
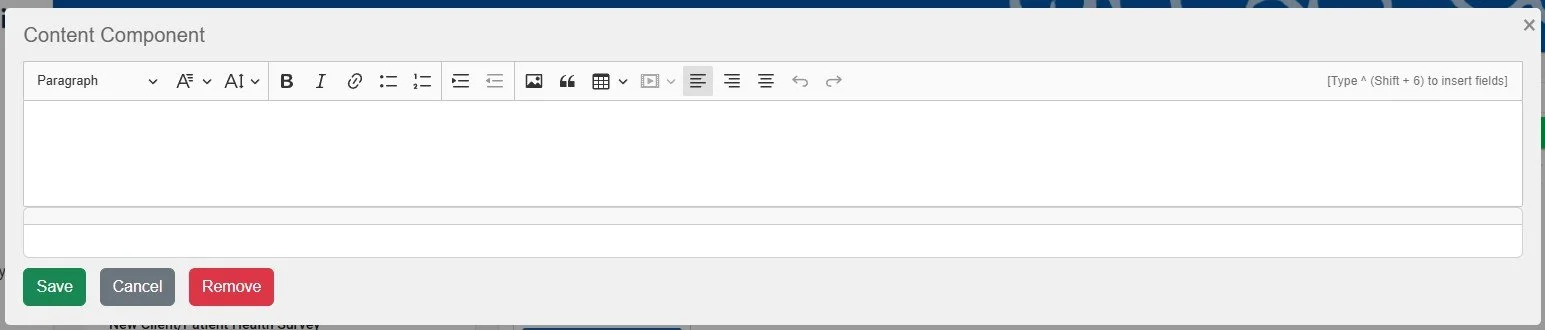
To add a Content component to a Template, drag it from the sidebar using the left mouse button, and drop it in the Template designer window - the ‘Edit’ panel will open automatically. To edit existing Content components, hover your mouse over the component, and click the ‘Edit’ spoked wheel icon in the hover panel of the component.
After making changes in the Content component, always remember to click the ‘Save’ button within the component and also the ‘Save Changes’ master Template save button to make any changes permanent. Clicking the ‘Cancel’ button at any point will revert the Template to its previous saved state.
Rich text editing
The Content component edit panel allows you to add text and format it. Click on the panel with your mouse left button to place the cursor, which is where typed text will appear. To drop a line within the paragraph use Shift+Enter on your keyboard, or to start a new paragraph click the Enter button on your keyboard.
To format a section of text, select it using your mouse by moving the cursor to the start of the desired section and press and hold the left mouse button. Then while continuing to hold the left mouse button move the cursor to the end of the desired section and let go of the left mouse button. The required section should be highlighted. Next choose one or more of the following options to format the text, or click the same button a second time to remove the formatting:
Paragraph / Header - click the drop-down menu to choose from 3 Header sizes (heavy set) or standard paragraph font size.
Font - click the drop-down menu to choose a different font. Roboto is used by default here and throughout AnalystAssist.
Font Size - click the drop-down menu to fine-tune the font size from ‘Tiny’ to ‘Huge’ in each range.
Bold / Italic
Bullet point list / Numbered list - all lines within the selected paragraph are structured into lists with bullet points or numbers.
Increase /reduce indent
Alignment - choose whether the text on the selected line is left, right or centre aligned.
Please Note: The Content component uses your browser’s default spell-check functionality, which appears as red lines under incorrect text. To set the language being checked against or if it is not working, click your mouse right button over the panel and select the appropriate settings.
Hyperlinks
Adding a hyperlink
To turn a section of content into a hyperlink to link to a webpage, highlight a section of text and click the hyperlink button to open the ‘Insert Link’ dialog. In the URL box add the URL that you want to link to (must be with a https:// format.) then click the green tick icon to save or the red cross icon to exit without saving.

Editing / removing a hyperlink
To edit or remove an existing hyperlink, click the linked section of text in the Content component. This will open the hyperlink edit panel. Click the ‘pencil’ icon to edit the link address, or the ‘hyperlink cancel’ icon to remove the hyperlink.

Adding images, quotations or tables
The Content component also allows you to add images, quotation sections or tables to the edit panel:
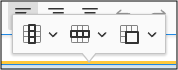
Inserting an image
Click on any row of the edit panel to position the cursor and then click the Image button to open the ‘File Browser’ dialog.
Select an image file, and click the ‘Open’ button to insert an image at the selected position. Click ‘Cancel’ or the ‘Escape’ key to exit without inserting an image.
When the image appears, click the image to display the re-sizing controls (blue squares) at the corner of the image & the image control panel.
Resize the image - drag the re-sizer controls to re-size the image.
Change alt text - in the image control panel at the top of the image, click the alt text button to set the alt text
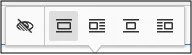
Change image alignment - in the image control panel, select left, right or centre-aligned for the image in the container.
When you are finished editing the image, click the inner-component ‘Save’ button and the the main Template ‘Save Changes’ button to make the changes permanent in the database. Clicking the ‘Cancel’ button in the Content component will close it without saving any changes.
To delete the image in the Content component, click on it to select it and click the ‘Delete’ key on your keyboard. Remember to ‘Save’ again afterwards.
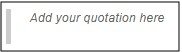
Adding a quote section
Select any text in the Content componenet edit panel and then click the Quote button to format that section as a quote block. This adds a grey bar to the left and converts all included text to italics.
Press ‘Enter’ key twice to leave the quote section. To undo, reselect the quote text and click the ‘Quote’ button for a second time.
Adding a table
Click on any row of the edit panel to position the cursor and then click the Table button to open the table config panel.
Move your mouse to select how many rows and columns you want. The table will stretch to fill the container.
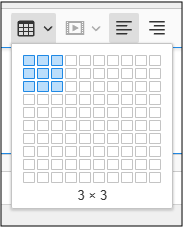
Click on the bottom right blue square of your selected table. The table will be added to the Content component edit panel.
Click in any cell to add text & to display the table control panel above the table.
The table control panel includes options to insert/delete rows and columns, merge and split cells, and convert rows and columns into headers (bold font).
To remove the table, click the blue box in the top-left corner of the table, and click the ‘Delete’ key on your keyboard.

Field tag insertion
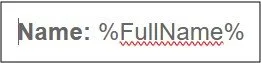
To make Forms or Reports customised for every Client/Patient, it is possible to add generic field tags that are replaced by actual Client/Patient or Appointment data when the report is generated or the form is opened by the Client/Patient. These tags are represented by the field name book-ended by % chars e.g. %LastName%.
The list of available field tags depends on where the Content component is being used (Form Templates or Report Templates), and it is displayed by typing the char ^ (shift + 6):
Click the Content component edit panel to place the cursor where you would like the field tag to be added.
Type ^ (shift + 6) on your keyboard - this will open a drop-down selector list that includes all the available field tags.
Select a field tag in the list, and the list will close and the field tag will be inserted in the text panel as the field name surrounded by %%.
To remove an inserted field, just delete the field tag text within the Content component edit panel.
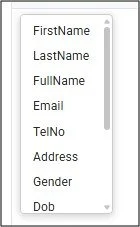
Available field tags
The following tags are available in the Form Template designer:
First Name
Last Name
Full Name - The Client/Patient’s First Name followed by Last Name
Email
TelNo - Telephone Number
Address
Gender
Dob - Date of Birth
Age
PrevAppt - The date of the Client/Patient’s most recent Appointment
NextAppt - The date of the Client/Patient’s next Appointment
Created - The date that the Client/Patient record was created
ClinicAdd - The global ‘Main Clinic Location’ as set in the Settings Page
In the Report Template designer the field tag list includes the above tags as well as these additional ones:
ApptDate - The date of the Appointment record that is currently open
ApptTime - The time of the Appointment record that is currently open (if set)
ApptLocation - The ‘Location’ selected in the Appointment record (if set)