
User Manual
Settings Page
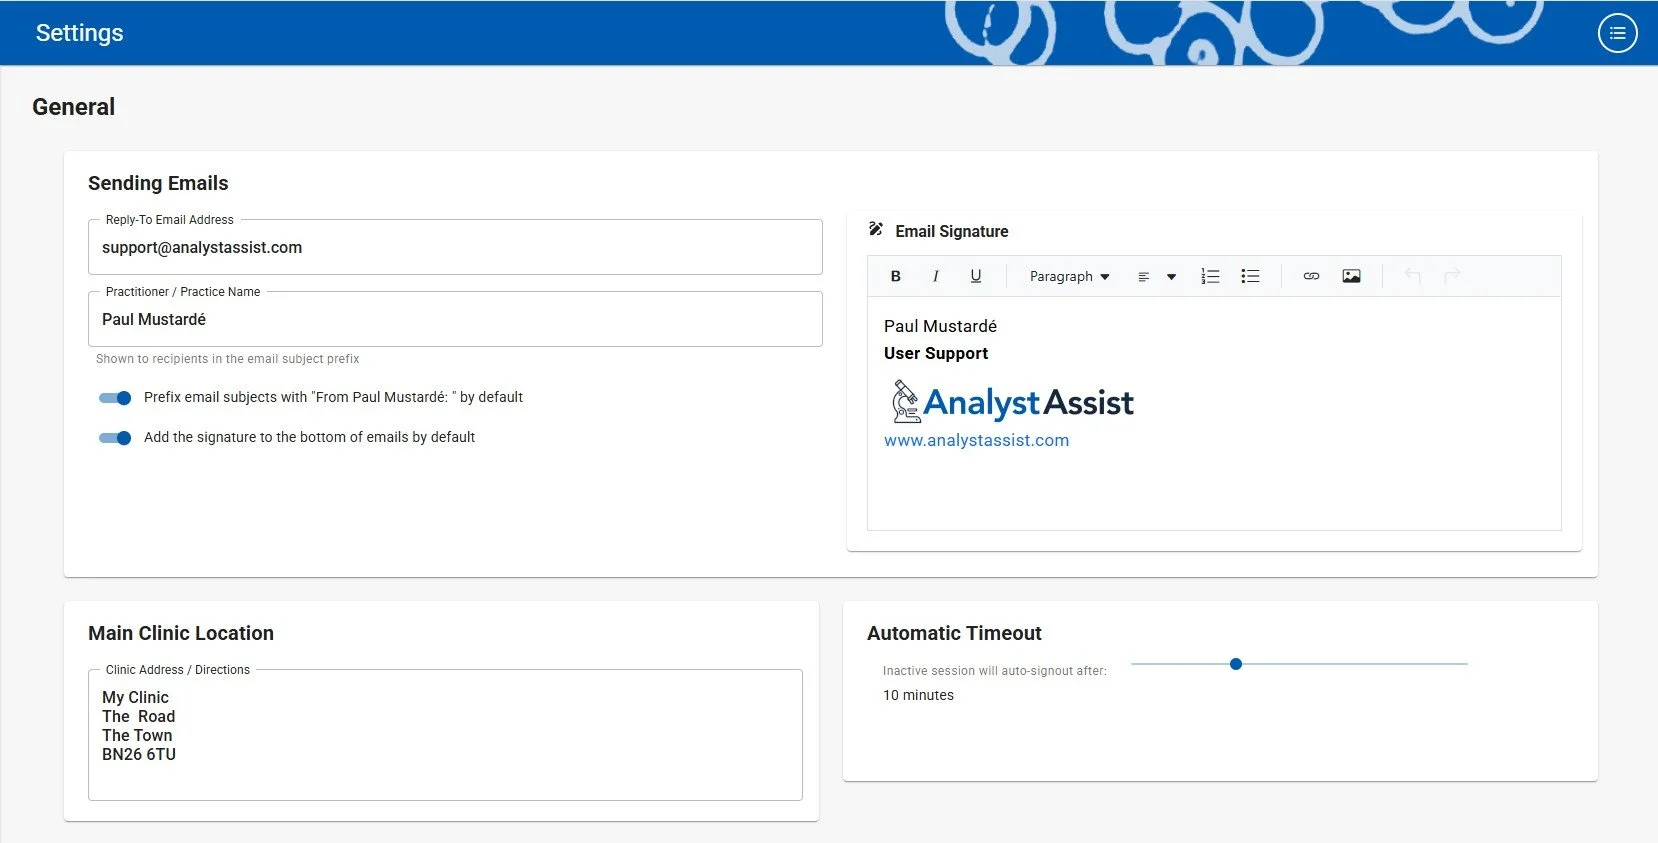
The Settings page is reachable from the Admin Menu (click the round Admin button in the top-right corner of the screen) and is where all the global settings for AnalystAssist are configured.
General Settings
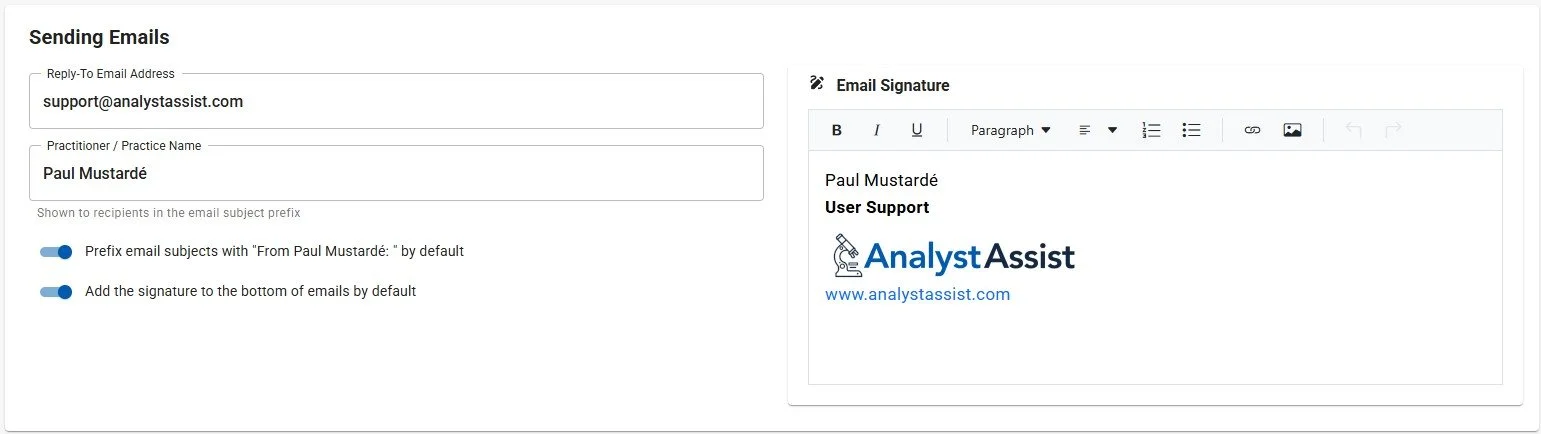
Sending Emails
Reply-To address - Add a ‘Reply-to’ email address instead of using the default no-reply AnalystAssist email address. When you send emails to Clients/Patients from within AnalystAssist, the recipient can click ‘Reply’ and the email will be sent back to your configured email address.
Practitioner / Practice Name - Add a name that will be automatically added as a prefix to the subject line in the Compose Email dialog, so email recipients instantly recognise who the email is from. After saving, the ‘Prefix on by default’ switch will be switched ON automatically - it can be disabled at any time by changing the switch to the OFF position.
Email Signature - Add a standard footer for all emails, that can include text, images and hyperlinks. After saving, the ‘Signature on by default’ switch will be switched ON automatically - it can be disabled at any time by changing the switch to the OFF position. This feature uses a pared-down version of the DictationRTE panel - see here for more information.
Click the ‘Save Changes’ button that appears in the panel to update these fields in the database. Click ‘Cancel’ to undo any changes.
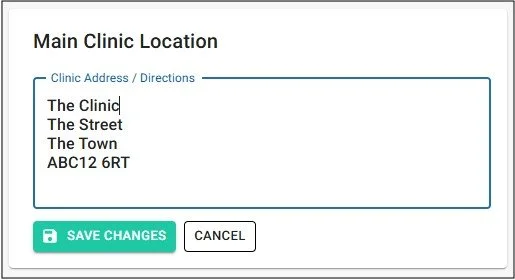
Main Clinic Location
Add an address or directions to your place of work. This field can be embedded in Email templates and Content blocks of Form and Report templates, by inserting the %ClinicAdd% field tag.
Add multi-line text to the box by clicking the ‘Enter’ key to drop to a new line, and when you are done click the ‘Save Changes’ button to update the field in the database. Click ‘Cancel’ to undo any changes.
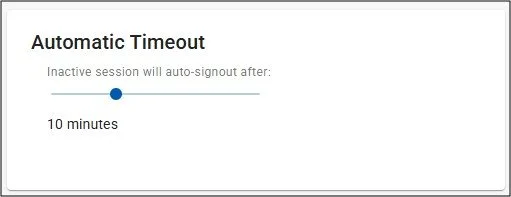
Automatic Timeout
For data-privacy compliance AnalystAssist is designed to log out automatically after a specified period of inactivity. By default this period is 10 minutes, but can be adjusted to suit from 1 minute to 30 minutes. Simply move the slider to adjust the setting.
Please Note: Inactivity Timout is suspended when the Live View panel is open.
Display options
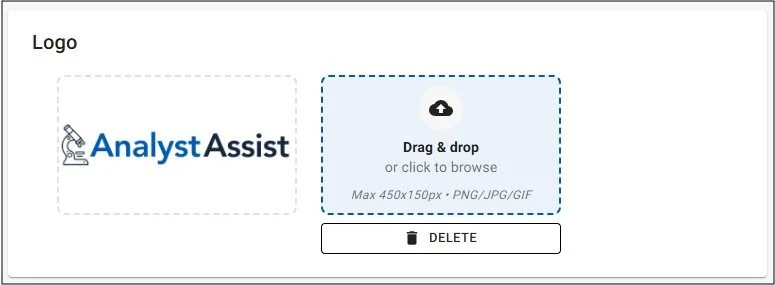
Logo
Upload a logo file for use in Form and Report Templates - this image will be used in place of the default AnalystAssist logo. Image files must be of filetype .png, .jpg, or .gif.
To upload a file, either:
Drag a copy of a file (by clicking and holding your left mouse button on a file) over to the blue panel and then releasing the mouse button.
Click the blue panel to open the File Explorer dialog and browse for a file in your computer’s storage. When you have selected a file, click ‘Open’ or click ‘Cancel’ to close the Explorer without selecting a file.
When an image file has been uploaded, it will be displayed in the panel to the left, and you can click the ‘Delete’ button at any time to remove the image file from the database.
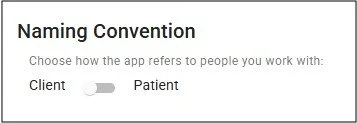
Naming Convention
Depending on your preference, switch the nomenclature used throughout AnalystAssist between ‘Client’ and ‘Patient’, by throwing the switch.
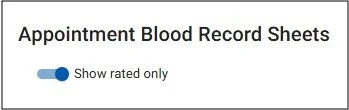
Appointment Blood Record Sheets View
Change the default behaviour of Appointment record Blood Record Sheets. Choose between displaying all Indications whether rated or not, or only those that have been rated, each time an Appointment record is opened.
Configure selections
This section is where the global values for various features are managed.
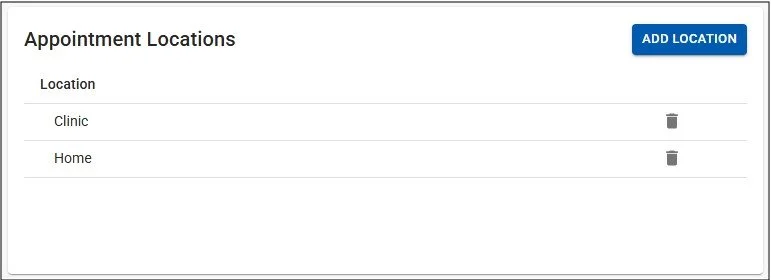
Appointment Locations
This property is used optionally in the Appointment record to easily differentiate between different sites where appointments are held. The table is sortable by Location name alphabetically in ascending or descending order - click on the Header of the Location column to change order. If there are greater than 4 entries, with your mouse left button hold and pull down the scrollbar on the right side of the table to scroll the table.
NB: Any changes made here (changing or deleting a Location) will also be persisted to all Appointment records that include the relevant Location.
Click the ‘Add Location’ button to add a ‘New Location’ entry to the table. Click in that or any other entry to change the text, then click the ‘Update Location’ button to save changes in the database. Alternatively, press the Escape key (not Safari) or click elsewhere on the page to return to the existing value and end the edit process. Click the trashcan icon next to any entry to delete it - you will be asked to confirm the deletion before the database is updated.
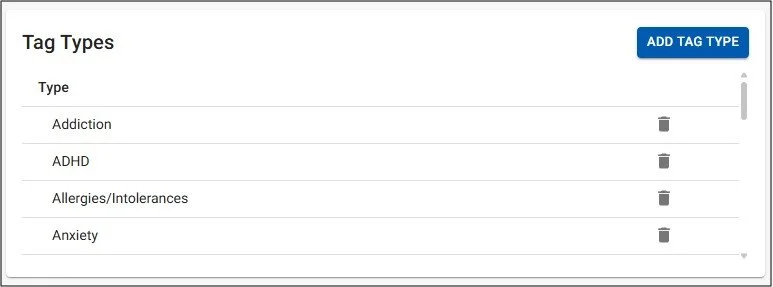
Tag Types
Tags are used in the Client/Patient record page to identify Client/Patients by symptom, treatment regime, demographic or any other descriptor. This also allows you to search by those Tags in the Client List page.
The Tag Type table is sortable by Type alphabetically in ascending or descending order - click on the Header of the Type column to change viewing order. If there are greater than 4 entries, with your mouse left button hold and pull down the scrollbar on the right side of the table to scroll.
NB: When a new Tag is added within a Client/Patient record page, it will also be added to this global Tag Type table.Any changes made here (changing or deleting a Tag Type) will also be persisted to all Client/Patient records that include the relevant Tag.
Click the ‘Add Tag Type’ button to add a ‘New Tag’ entry to the table. Scroll down and click in that or any other entry to change the text, then click the ‘Update Tag Type’ button to save changes in the database. Alternatively, press the Escape key(not Safari) or click elsewhere on the page to return to the existing value and end the edit process. Click the trashcan icon next to any entry to delete it - you will be asked to confirm the deletion before the database is updated.
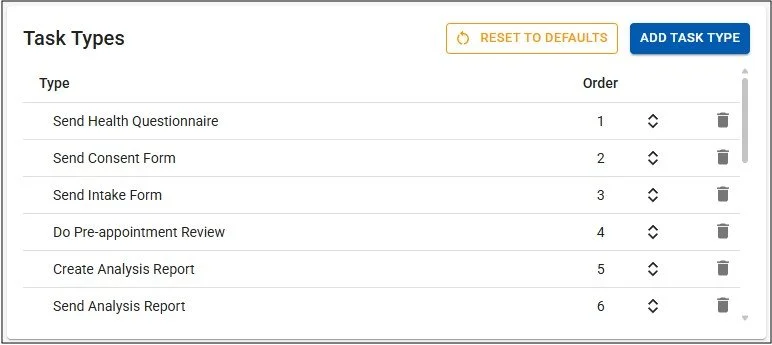
Task Types
Tasks are used in the Client/Patient record page to create reminders for yourself of actions required for a Client/Patient. Task Types have an Order property which denotes the order in which the Task Types are displayed when creating a new Task in the Task panel in Client/Patient records.
The Task Type table in the Settings page is sortable by the Order column in ascending or descending order - click on the Header of the Order column to change viewing order. If there are greater than 4 entries, with your mouse left button hold and pull down the scrollbar on the right side of the table to scroll.
Click the ‘Add Task Type’ button to add a ‘New Task Type’ entry to the table in Order position 1. Click that or any other entry to change the text, then click the ‘Update Task Type’ button to save changes in the database. Alternatively, press the Escape key(not Safari) or click elsewhere on the page to return to the existing value and end the edit process. Click the trashcan icon next to any entry to delete it - you will be asked to confirm the deletion before the database is updated.
To change the Order position of an entry, use the up/down arrow buttons next to the entry to change to the desired position, then click the ‘Update Task Type’ button to confirm the change. Alternatively press the Escape key(not Safari) or click elsewhere on the screen to revert to the previous saved positions.
Please Note: To return to the default TaskTypes list, click the ‘Reset to defaults’ button - be aware that this is a permanent revertion and any changed TaskTypes will be lost.
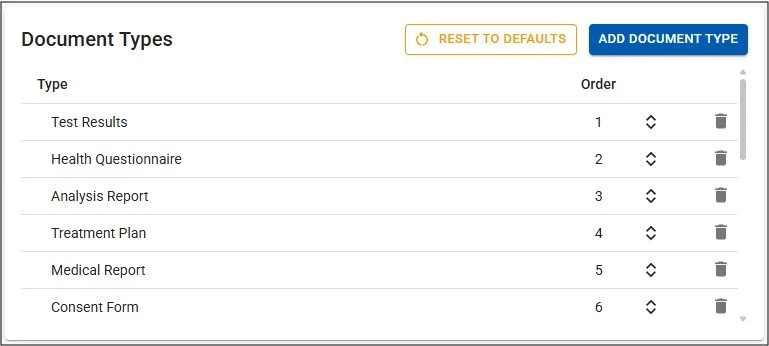
Document Types
These are used in the Document Folder of Client/Patient records and the global Document Library to help identify and organise Documents. Document Types have an Order property which denotes the order in which the Document Types are displayed when adding a Document Type to a Document.
The Document Type table in the Settings page is sortable by the Order column in ascending or descending order - click on the Header of the Order column to change viewing order. If there are greater than 4 entries, with your mouse left button hold and pull down the scrollbar on the right side of the table to scroll.
Click the ‘Add Document Type’ button to add a ‘New Document Type’ entry to the table in Order position 1. Click that or any other entry to change the text, then click the ‘Update Document Type’ button to save changes in the database. Alternatively, press the Escape key(not Safari) or click elsewhere on the page to return to the existing value and end the edit process. Click the trashcan icon next to any entry to delete it - you will be asked to confirm the deletion before the database is updated.
To change the Order position of an entry, use the up/down arrow buttons next to the entry to change to the desired position, then click the ‘Update Document Type’ button to confirm the change. Alternatively press the Escape key(not Safari) or click elsewhere on the screen to revert to the previous saved positions.
Please Note: To return to the default Document Types list, click the ‘Reset to defaults’ button - be aware that this is a permanent revertion and any changed Document Types will be lost.
Live & Dry Blood Record Indications
These panels define the list of blood Indications that are used in the Live or Dry Blood Record Sheets of Appointment records (and in the Live View panel). Indications have an Order property which denotes the order in which the Indications are displayed in new Appointment records.
Each Blood Record Indications table in the Settings page is sortable by the Order column in ascending or descending order - click on the Header of the Order column to change viewing order. If there are greater than 4 entries, with your mouse left button hold and pull down the scrollbar on the right side of the table to scroll.
NB: Any changes made here (adding, changing or deleting an Indication) will only be persisted to new Appointment records NOT existing Appointment records. Also, to return to the default Indication list, click the ‘Reset to defaults’ button - be aware that this is a permanent revertion and any changed Indications will be lost.
Click the ‘Add Indication’ button to add a ‘New Indication’ entry to the table in Order position 1. Click that or any other entry to change the text, then click the ‘Update Indication’ button to save changes in the database. Alternatively, press the Escape key(not Safari) or click elsewhere on the page to return to the existing value and end the edit process. Click the trashcan icon next to any entry to delete it - you will be asked to confirm the deletion before the database is updated.
To change the Order position of an entry, use the up/down arrow buttons next to the entry to change to the desired position, then click the ‘Update Indication’ button to confirm the change. Alternatively press the Escape key(not Safari) or click elsewhere on the screen to revert to the previous saved positions.
To add or update an Indication’s Notes, click the Notes icon in the row and the Notes panel will appear. Images can be pasted into the panel or uploaded using the Images button, and will be re-sized automatically. All changes in the Notes panels are auto-saved.

Prescription Types & Frequencies
These options are used in Appointment record pages in the Prescription / Protocol table. They both have an Order property which denotes the order in which the options are displayed when creating a new Item in the Prescription / Protocol table.
Both tables in the Settings page are sortable by the Order column in ascending or descending order - click on the Header of the Order column to change viewing order. If there are greater than 4 entries, with your mouse left button hold and pull down the scrollbar on the right side of the table to scroll.
Click the ‘Add Type’ or ‘Add Frequency’ buttons to add a new entry to the tables in Order position 1. Click that or any other entry to change the text, then click the ‘Update Type’ or ‘Update Frequency’ button to save changes in the database. Alternatively, press the Escape key(not Safari) or click elsewhere on the page to return to the existing value and end the edit process. Click the trashcan icon next to any entry to delete it - you will be asked to confirm the deletion before the database is updated.
To change the Order position of an entry, use the up/down arrow buttons next to the entry to change to the desired position, then click the ‘Update Type’ or ‘Update Frequency’ button to confirm the change. Alternatively press the Escape key(not Safari) or click elsewhere on the screen to revert to the previous saved positions.
Please Note: To return to the default Prescription Type or Prescription Frequency list, click the ‘Reset to defaults’ button - be aware that this is a permanent revertion and any changed Types or Frequency entries will be lost.
